Showing posts with label education. Show all posts

Tuesday, April 19, 2016

Outdoor Sightwords Activity: Dumptruck!


This is my third time to teach a child to read, and I still love it.  I love getting to be there when a child has that whole new world of literacy opened up to him.  But that's not to say it doesn't get tedious...a lot.

And of course, if it is tedious for me...how much more for a squirmbunctious little boy!  Here's one of the activities we've done lately to mix things up a little. It was a big hit!

Friday, October 25, 2013

Stained Glass: Kids Medieval Project

When I visited Europe as a child, I remember being struck by the Gothic stained glass windows, and particularly the rose windows found in so many cathedrals- for their symmetry and massive scale.  So this year as we've been homeschooling through the Middle Ages, I found myself wanting to help my children interact a little with the beauty of Gothic stained glass somehow.  

I liked the way this project allowed my children to do their own work but create pieces that were unique and presentable.  I had envisioned helping them a great deal, but found that the the art mediums at both stages of the project were very forgiving.  My six-year-old and four-year-old made their windows almost entirely on their own. I think an older child could include finer detail and could maybe be more creative with the project.

Materials:

Glass rectangle from a small picture frame 
Black fabric puffy paint with a fine tip
Acrylic paints
Clear liquid glue

Monday, October 29, 2012

Letter H Craft: Hotdogs

This year I'm the nursery coordinator for our chapter of our homeschool co-op, Classical Conversations. Part of that job involves coming up with simple "Letter Crafts" for each week. I haven't posted about them so far because for the most part, I have been using other people's ideas.
(like this cute little apple tree craft that I found at Learn, Create, Love)

For letter "H" though we made a hot dog craft that I came up with, and since the kids got a kick out of it, I thought I would share.  I made an easy template for the bun and hot dog and cut copies out of card stock and construction paper to be glued together.  Then the kids glued on pieces of yellow and red yarn for the condiments and bent the sides of the bun upward to look like a real hot dog.
Pretend food is the best!


Tuesday, August 14, 2012

Spray Away Chalk Letters

We use spray bottles a lot around our house.  Most often we use them to help de-tangle and de-frizz our curly haired girls.  (we also use them to spray out wrinkles because we hate to iron!)

One problem though...spray bottles are just too fun.  It's hard for little girls to resist spraying them all around the house.

The last time one of them gave the playroom floor a good soaking and caused the other one to slip and go flying I inwardly vowed that I was going to find some fun outlets for spray bottle spray that wouldn't make me grumpy.
For our first non-grumpy spray bottle activity, I tried a simple literacy idea.  G is often better at telling me the sounds that a letter makes than remembering its name.

So for a little review, I wrote out the letters of the alphabet in chalk on our back patio and gave the girls each a spray bottle. When it was their turn, I named a letter and their job was to find and spray it away.  We went back and forth until all the letters were erased.

 Simple, fun, and no grumpy mom at the end= what I was shooting for.

Do you have any more spray bottle ideas for us that fit this equation?

Thursday, May 3, 2012

Cinco de Mayo Crafts

Before we moved to Texas I don't think I even knew what Cinco de Mayo was. Now that we're here, we see signs of it everywhere.  (If you live in Austin, you might want to check out 10 Free Family Friendly Cinco de Mayo Events for this year from Free Fun in Austin)
I figured doing a simple Mexican flag craft with the girls this year was a good opportunity to sneak in a little geography and history.  We pointed to where Mexico is on the map and looked up the Mexican flag.  (The girls love pointing out flags when we drive in the car; I'm pretty sure they'll be noticing some from Mexico in the next few days)

 Here's how we made a festive Mexican flag drinking straw with kids:

1.  Cut a green and a white straw into several pieces.  Slit each piece down the side with a pair of scissors.  (Don't look too closely at my picture.  I didn't happen to have any white straws at the time; so I used a piece of ribbon for the white)

2.  Slip several pieces of white and green onto a red straw.

3.  Print two copies of a Mexican flag from your printer.  Glue their backs together and use a piece of clear tape to attach to the straw 2/3 from the top.

4. To make your straw extra fancy, cut a small piece from another red straw.  Cut fringes into each end of the piece with a pair of scissors.  Slit the piece all along one side with a pair of scissors and slip on to the straw just above the flag.

If you are in the market for Cinco De Mayo crafts you might also take a look at the Mexican jumping bean craft I wrote about a couple of years ago.  The template is provided as well as a video showing how it works.  (It feels alive in your hand and is so fun to watch)


My friend Rebecca's over at Quirky Momma also has some fun ideas on celebrating Cinco De Mayo with kids!


Does your family celebrate Cinco de Mayo?  I'd love to hear what kinds of things you do together!

Thursday, April 26, 2012

Dot-to-Dot Learning Activity

Yesterday, I decided to pick up a preschool workbook and work through a couple of pages with my 2 and 4 year old just to see what we've been missing.  We do a fair number of academically oriented activities, (like playdough spelling, and post-it note words) but they tend to be a little more hands-on.

At the end of our workbook time, I mostly felt that we had not been missing out on much (for one thing- the kids spend half their time trying to figure out what the directions are asking them to do.  It's not a bad thing to learn how to follow confusing directions, but it's not the main skill I'm trying to teach them right now)

The one thing we did really like were the dot-to-dot pages- especially the alphabet dot-to-dots.  My two-year-old doesn't have enough coordination yet to draw the lines herself, but we were able to work out a system that was fun for her and a great little learning activity.

Here's what we did:

 Me: Can you find the "a?"
G: (points)
Me:  Good, what comes next?
G: "b"
Me: Can you find it?
G: (points)
Me:  (draw line to "b" while both of us make the bbbbbb sound until I get there)

It was especially a good way to practice lowercase letter recognition and letter sounds.  G watched in happy anticipation for the picture to "appear."
Here's a site with some printable alphabet dot-to-dots if you're like me and would like to do some dot-to-dots without having to buy a workbook full of the other stuff!

Do your kids like dot-to-dot pages?  Have you found any fun or educational twists?  


Friday, March 30, 2012

Nocturnal Animals Project: Watercolor Resist

For our Five-in-a-row homeschool co-op recently we read the book Owl Moon.  One of  our conversation topics afterward was the concept of nocturnal and diurnal animals.  My husband suggested that we also talk about the special reflective eyes that God gave night animals.  Nova has a good article describing the science of a nocturnal animal's eyes.  

I was really tickled to find this lightning bug project from Toddler Approved that provided the inspiration for our art project.  For our co-op project I:
1  Printed off a page of nocturnal animal pictures I found on the internet.  
2.  Gave each child a yellow crayon to color in the animals' eyes (Coloring around the eyes a little is a good idea to make them stand out better) and the word "nocturnal."
3.  Allowed the children to paint over the whole picture with dark watercolors.  The yellow crayon resists the paint and makes the eyes pop out.  


learning laboratory at mama smiles

Tuesday, January 31, 2012

Fishing for Letters Hangman

A while back I saw this cute idea to fish for refrigerator letters in the bathtub and ever since have wanted to try  the same concept but adding the hangman twist.  A brand new package of refrigerator magnets means we still have the whole alphabet (two days from now, six of them will likely be hiding with the dust bunnies under my refrigerator); so today seemed the day to jump on it.

Our bathroom is pretty tight; so I didn't actually want to do it in the bathtub, but it actually turned out well to use two small tubs.  We separated out the letters into vowels and consonants to make it a little easier to catch the vowels.

For the fishing pole we used a ruler, a string, and a clothespin with a magnet in its "beak."
 It had been a while since I'd played hangman; so I made the mistake of thinking that shorter words are easier (of course, the longer the word the more likely it is to have any particular letter that is guessed).  Adding the fishing for letters twist makes it even harder for the guesser to win; so I'm afraid I beat them soundly every round we played (even after I added ridiculous levels of detail like shoelaces).  M and G didn't seem to mind defeat- they wanted to play over and over (well, M wanted to play; G wanted to dance her fingers in the water with the letters)

For the final round, M picked the word and let me fish for the letters.  I was very proud of her for doing it exactly right.  It seemed like it stretched her mental muscles in a new way which is always good.

Learning Laboratory

Wednesday, January 11, 2012

3 Russian Crafts for Kids

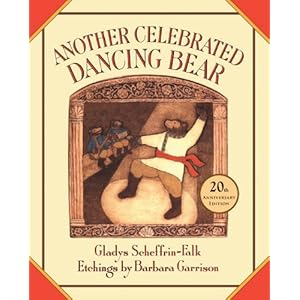
In our Five In a Row co-op this week we read the book Another Celebrated Dancing Bear which takes place in Imperial Russia.  I believe this is the first book we've read with that setting; so I was pretty excited to see what kinds of crafts I could find to illustrate Russian culture.

1.  Printable nesting dolls.   I love these adorable Russian nesting dolls.  You can print them out in full color or in black and white outline to color them yourself.

2.  Faberge eggs.  I am honestly shocked that I have been unable to find any children's nonfiction books containing the story of the Fabrege eggs. Their history is all about riches, surprises and lost treasure- just the kind of thing kids love, and such a great way to teach about Imperial Russian and the 1917 Revolution.  If you want to tell your children the story and show them a few pictures, this link from PBS has a pretty good summary.

We used a really fun silk technique to dye the eggs.  They don't actually look all that similar to the historical Faberge eggs, but they're fancy- which is basically what we were going for.  I'll be writing about how to make them in an upcoming post.
3.  Russian Architecture-  The colorful onion domes on the Orthodox churches in Russia are so striking. I thought it would be fun to let the kids design their own churches in this style.

My husband (who has a much steadier artistic hand and loads more patience for historical accuracy) sketched some historically accurate domes and spires for me on a piece of card stock.  I used those as templates for cutting out lots of domes and spires from different colors of construction paper, along with some other basic shapes.  The kids could then arrange them like building blocks on their page and glue them on once they found an arrangement they liked.  They used markers to draw on details like windows, stripes on the domes, and crosses.

Any other ideas for Russian kids' crafts?  


Wednesday, January 4, 2012

Comprehension Cards

A little while back my mom picked up a pack of spelling flashcards at a garage sale.  M loves them because they are "self-checking" flashcards, meaning she can do them on her own.

The concept behind the cards seemed easy enough to replicate; so I made up a set of reading comprehension cards that M could use in her rest time to go along with some of her favorite picture books.

Each card contains a multiple choice question, and next to each answer I punched a hole with a hole punch.  On the back of the card, the hole of the correct answer is circled.  M's job is to push the end of a pen or pencil through the correct hole.  She turns the card around to see if she's right.

The flashcards got tucked into a scrap paper pouch I made at the back of each book.   I did it for both fiction and non-fiction books, but the questions for the fiction books seemed to work a little better for M.

Little G has been asking for some flashcards of her own.  Any ideas for how I might modify the concept for a pre-reader?  

Wednesday, November 30, 2011

Nutrition Treasure Hunt

Well, we just got done with three messy baths, and the house is still in need of a good scrubbing, but I think it was worth it. We spent the morning digging in the dirt and mud for the plastic play food pieces that I buried in the garden.
I let the girls loose with spoons and shovels to find the food with instructions that the items worth the most number of "points" were the pieces of healthy food.  They aren't old enough to keep track of points for a real competition yet, but they enjoyed finding things and asking, "How much is this worth, Mom?"  If it was a piece of pizza or a can of processed food, I might just say, "One point."  But green leafy vegetables were worth 3 or 4 points.
They definitely did NOT find every piece of food I hid.  (I often overestimate toddlers' and preschoolers' finding abilities.)   I do believe we're going to be digging up plastic potatoes and carrots along with the real ones when our next garden harvest comes in!
WFMW

Tuesday, November 29, 2011

Flower Patterns

When a bouquet starts going south, get a little educational enjoyment out of it by lining up patterns of flowers. Let your child discern the patterns and place the next few flowers in each row.


Wednesday, November 9, 2011

The Story Road

This is Annie. She took a little trip down the story road today. She hopped from book to book as we told a story about her, each aspect of the story relating somehow to the book she was on.
 The book paths forked and combined at various points so the author could decide what kinds of things they wanted to include.
 Each of us took a turn making up a story with Annie and the books. I went first, and it was interesting to see how each girl copied a bit of what I did but also added her own elements. We came up with some pretty crazy stories :-)
(You might have noticed that both girls are wearing two sets of clothes- leftovers from their self-declared "dress-up day.")

Tuesday, November 8, 2011

Three Art Mediums for Three Types of Clouds

1.  Cirrus - white chalk
2.  Stratus- thick gray paint
3.  Cumulus- equal parts shaving cream and glue.  It dries fluffy and textured- really fun!
     (for cumulonimbus- add a little black paint)

We did this as a go-along activity for Mr. Gumpy's Motorcar and The Cloud Book today in our homeschool co-op.  I liked that it worked for our wide age range  (3 year olds through six year olds)

Friday, November 4, 2011

Numbered Sticky Note Name Spelling

I was going to write today about our thankful tree plans for this year, but I'm afraid time has gotten away from me this afternoon, and I don't have a picture ready to go with it.

Instead, I'll just show you what we did this morning for G's school time.

1.  Six sticky notes lined up and numbered one through six.
2.  Six more sticky notes- each with a letter of G's name spread out randomly on the table.
3.  We sang the silly little song I made up to help G remember how to spell her name.  As we sang each letter, I asked her to find the corresponding sticky note.
4.  I instructed G to put the sticky note letter on the correct numbered sticky note.

It was good practice for practice for G with:
- spelling her name
- identifying upper and lower case letters
-identifying numbers

What other activities have you tried to help your child learn how to spell his name?  


Friday, October 21, 2011

Counting Activities

Looking for fun and simple ways to practice counting with your little one?  Here are some cute ideas from around the web.


1.  Paper rolls and twigs from Montessori on a Budget
2.  Roll and Stamp Man from Pre-K Pages
3.  Pipe Cleaner Counters from Kids Matter
4.  Marshmallow Teeth Game from Mama Bee from the Hive

1.  Jumbo Clothes Pin Letters from Counting Coconuts
2.  Shells and Glass Beads from RockaBye Butterfly
3.  Peanut Butter and Jelly Counting from Time for Play
4.  Gumball Machines from Michelle's Charm World

Monday, October 17, 2011

Lower Case Carrot Garden

You may remember my letter matching board from a couple of months ago.  It turned out to be a good tool for letter recognition; G thinks of it as a game, and it keeps her moving around while she learns.

   For a while now G has been ready to tackle lower case letters, but I didn't have any inspiration for the letter board until my husband suggested little carrots growing in the flower pots. M had fun gluing the carrot top greens onto her sister's game board.
 This morning we tried them out!


Thursday, October 6, 2011

Word Family Paper Dolls

This project combines three things that I love:

1.  Paper dolls
2.  Paper chains
3.  Early Literacy

To make a paper doll chain, fold a piece of paper several times in a fan style, like this:
 
Draw the figure of a doll on the front of one of the folded sections, making sure the hands reach all the way to both sides.  Cut out (but leave the folds intact!) Here's a template for a doll and dress if you'd like to use mine.
Unfold dolls.  Let your little girl decorate the faces, etc.
Cut several dresses out of scrapbook paper or fabric (you might not even want to bother with the tabs because it can get a little tricky to work with all those tabs on a string of dolls)

Write a letter on each dress, and let your little girl arrange into words
and sentences!


Wednesday, October 5, 2011

An Active Alphabet for Toddlers

I'm realizing more and more that G is just a more naturally active little girl than M was at her age.   Sitting still during school time can be a bit of a trial for her; so to make it  more engaging I've come up with a list of actions to go with each letter of the alphabet when we are reviewing phonics.

At first I tried super active gestures, and soon realized that was a BIG mistake.  Little G would start hopping and slithering all over the room, and it was impossible to get her focused again.  This list is comprised entirely of actions a little one can do while sitting.

A is for antlers (hold arms up high over head)
B is for baby (rock imaginary baby in arms)
C is for cuddle (wrap arms around self or eachother and hug)
D is for dig (hold hand as if grasping a shovel and pretend to dig dirt)
E is for elephant (hold arm out to nose and wave like a trunk)
F is for fan (fan self with hand as if hot)
G is for give (pretend to hand a box to the other person)
H is for happy (smile big)
I is for icky (make a face as if something is gross)
J is for jiggle (hold hands around an imaginary box and wiggle it)
K is for kiss (blow a kiss)
L is for laugh (hold one hand on belly and laugh heartily)
M is for monkey (scratch ribs with hands and make monkey noises)
N is for no!  (shake index finger and say "no" sternly- she really likes this one!)
O is for octopus (wave arms around as if they were tentacles)
P is for pillow (lay head on hands as if going to sleep)
Q- quiet (hold finger to lips and say "shhh")
R is for roar (place hand around face as if they are a lion's mane and roar)
S is for strong (flex muscles and look tough)
T is for touch (gently touch a person or object with a single finger)
U is for under (place one hand under the other)
V is for violin (pretend to play the violin)
W is for water (move hands over imaginary waves)
X says xxxxxxx (draw a giant x in the air)
Y is for yawn (yawn big and cover mouth)
Z is for zig zag (using pointer finger, draw a zig zag in the air)
Little G after some happy active backyard time.
I try to use words that : 


1.  a toddler knows and can relate to
2.  use the simplest phonic sounds (hard g and c sounds, short vowel sounds)


but I definitely think there's room for improvement.  Have you found any action words that work really well for your little one?

Monday, October 3, 2011

A Pre-Reading Habit

When you are reading aloud to toddlers, you can make it a habit to regularly pause before words that you think your child will be able to guess.  Place your finger on the word and wait for them to chime in.  It might feel like you are teaching them to guess instead of to read, but developing the kind of logic needed to figure out a word from context  is a big part of learning to read later on.  It's also a painless way to start practicing sight words (long before you think they're ready)

This works especially well with rhyming books.  For example, "Oh! They would put me in the zoo, if they could see what I can____"

"Do!" exclaims your child.

If they aren't able to guess, just supply the word and move on.  It's good to include some difficult pauses as well as easy ones to keep it challenging.

I employed this habit a lot when M was little, and I'm convinced it was really helpful for her.  Now I do it when I'm reading to little G, and she enjoys making a game out of it.

Do you have any other simple tips for developing reading readiness when your children are at the toddler stage?