

Wednesday, December 19, 2012
Thumbprint Reindeer Ornament
Running out of time to make a homemade Christmas gift for family members? Here's one that takes no time at all!
 Michaels has some flat, paintable ceramic Christmas tree ornaments.We used them to make thumbprint reindeer and then let the kids paint the other side however they wanted with acrylic paints.
Monday, December 17, 2012
Christmas Lanterns from Baby Food Jars

We covered the jars with tissue paper and mod podge. I cut letters out of black construction paper for the kids to glue on to make them more Christmas-y. (I had intentions of making a "love" lantern and a "peace" lantern as well, but haven't quite gotten around to those yet)
Mod Podge is non-flamable; so you could fill the lanterns with regular candles, but for kids' projects I really love the battery- operated tealight candles you can buy now. They are safe and pretty convincing.

Any other fun ideas for reusing baby food jars? (especially Christmas related would be fun!)
Monday, December 3, 2012
Thankgiving Banner: Fall Leaves

We did make a decorative banner using the pretty fall maple leaves my mother sent in the mail from Michigan. Just sharpie writing on each leaf and stuck to a couple of pieces of twine. Simple- and I think we will keep it in storage and see how it looks next fall.

I know it is a little late, but I hope you all had a lovely Thanksgiving!
Wednesday, November 14, 2012
Leaf Printing for Fall
Before Fall slipped away entirely I wanted to share this project I did with my girls a while back. Leaf printing on paper is an idea I found in MaryAnn Kohl's fun book Scribble Art. She recommends using thin paper, but since all my paper was thick and stiff, I decided to try using some old muslin I had left over from another project.

I liked the earthy way the muslin looks behind the prints. I used watercolor paint because I don't have an intention of washing it, but I think fabric paint would work as well.
Here are some tips I found for making good prints:
- Use sturdy, durable leaves with pronounced veins. I used white oak.
- Make sure the paint covers the leaf entirely but is not too thick or globby
- Press down the fabric on top of the leaf (instead of the other way around)
- The second print is often the nicest; so try blotting on scrap fabric before printing on the fabric you hope to use

M has been wanting to learn to sew lately; so I think we may turn these into some simple, small pillows.
For more fall project ideas for places without "real" fall leaves see our Fall Stained Glass craft, and painted toast leaves.
Monday, October 29, 2012
Letter H Craft: Hotdogs
This year I'm the nursery coordinator for our chapter of our homeschool co-op, Classical Conversations. Part of that job involves coming up with simple "Letter Crafts" for each week. I haven't posted about them so far because for the most part, I have been using other people's ideas.
 (like this cute little apple tree craft that I found at Learn, Create, Love)
For letter "H" though we made a hot dog craft that I came up with, and since the kids got a kick out of it, I thought I would share. I made an easy template for the bun and hot dog and cut copies out of card stock and construction paper to be glued together. Then the kids glued on pieces of yellow and red yarn for the condiments and bent the sides of the bun upward to look like a real hot dog.
 Pretend food is the best!


For letter "H" though we made a hot dog craft that I came up with, and since the kids got a kick out of it, I thought I would share. I made an easy template for the bun and hot dog and cut copies out of card stock and construction paper to be glued together. Then the kids glued on pieces of yellow and red yarn for the condiments and bent the sides of the bun upward to look like a real hot dog.

Sunday, October 28, 2012
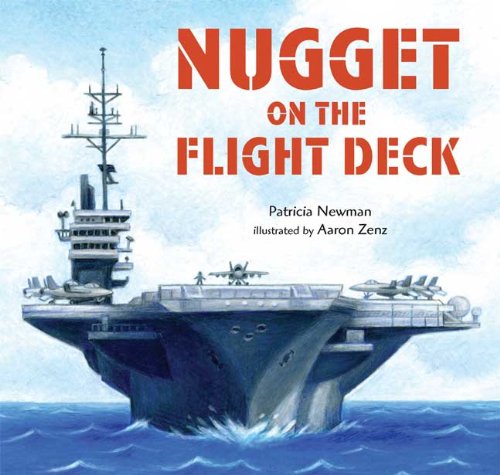
Children's Author/ Illustrator Aaron Zenz

Children's book author and illustrator Aaron Zenz and his wife Amity went to high school with me. About a month ago, Amity had surgery to relieve pressure on her spinal cord and brain. Recovery these weeks after have been rough going, complete with pain, blackouts, and intense nausea. Additionally, complications were discovered that required her to undergo a second operation on her brain. She is currently in the hospital with much pain and still without resolution of the complication.
Amity and Aaron have six children who Aaron supports with his writing and illustrating. Needless to say, this time has been more than difficult for the whole family. They can really use our prayers and encouragement. One way to encourage the Zenz family would be to visit Aaron's website aaronzenz.com and to support them by purchasing some of his very fun children's books or encouraging grandparents to do the same.

Thank you for considering doing one of these two things to support some really precious people!
Wednesday, October 24, 2012
Time to Putter
I was reminded of the importance of puttering time at home this Saturday morning when we were all wandering around lazily (R and I still in our pajamas). I was feeling just a tad bit guilty for not planning something and making better use of our precious family time when I spotted something on the window. It was a big green bug clinging there (from the outside)
 Everybody gathered around and got a chance to examine this beautiful creature "safely" and up close. We all seemed to notice something different- from his sticky feet to his interestingly scaled underbelly. It was a gentle and enjoyable time, and it struck me again how that family togetherness often happens best organically.
I was glad we puttered that morning.


I was glad we puttered that morning.

Tuesday, October 16, 2012
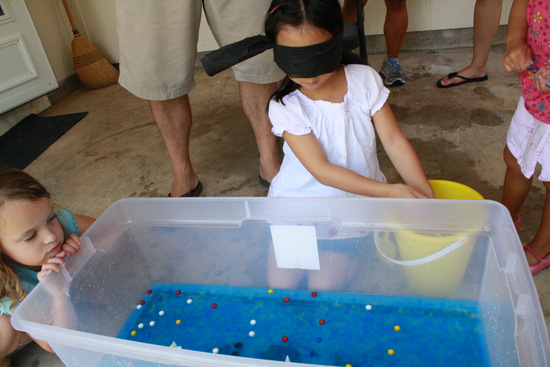
Waterbeads and Marbles Fishing Game

Kids love the feel of them in their hands, and lots of people have written about ideas for playing with them. Teach Preschool has a very fun list with lots of inspiration.
For M and G's birthday we filled a large tub full of them, added some water and threw in several dozen glass and plastic marbles. Since it was a rainbow fish birthday theme we thought it would be fun to turn it into a fishing game. Each child took a turn with a blindfold and had a minute to pick out as many marbles as they could.

We had some competitive kids. They played over and over, beating each other's scores for over an hour and a half. (My poor husband was such a trooper in overseeing the game for that long!)

The next day, M, G, and I had bonus fun throwing the waterbeads at each other. We found them to be terrific ammunition as they are soft, bouncy, and wet.

Thursday, September 20, 2012
MaryAnn F. Kohl: Art with Young Children and a Giveaway
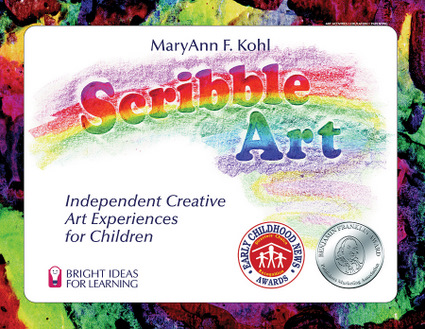
 MaryAnn recently sent me a copy of Scribble Art to review, and the girls and I have been having a ball trying out the activities there. So far, we've done salt painting, made an easy piñata, and tried tissue paper collages (my favorite so far!)
The thing I love about MaryAnn's books is her obvious and genuine care for children. It is tempting as a parent or a teacher to gravitate toward art projects that "turn out well," with end-products that make adults feel that the time has been worthwhile. MaryAnn, on the other hand, sees art from the perspective of a child and knows that it is the creative exploration that is often very special to children. That's why in Scribble Art, you'll find oodles of ideas for open-ended art experiences.

 Who knew that there were so many possibilities for art mediums and canvases around the house? Liquid starch, flour, sawdust- even insulated telephone cable find their way into over 100 activities that children can do independently for the sake of fun and beauty.
I'm finding it can be a great boon to have this arsenal of fun lying about the house, by the way. The other day, as I was making dinner and needed to work uninterrupted, I found the tissue paper collages to do the trick nicely!
So let's turn now to MaryAnn and hear her perspective on doing art with young children.

1. Can you tell us a little about the role art has played in your own life personally, both as a child and an adult?
When I was little, I was constantly coloring in coloring books and on blank paper, and at times, on the walls. My mom provided me with scissors, glue, paper, and wonderful crayons all at my reach on a shelf we called the coloring shelf. As I grew, I had some talent with drawing, though I was never super talented, but I enjoyed it enough that I was often complimented on my work. This encouraged me to volunteer to do covers for classroom books or decorate invitations for the Halloween Party. When I began teaching, I found that even the most rowdy child would quiet down and become focused when doing art, and by art, I mean actually creating unique work with materials on hand, not copying something I the teacher had made. So I made sure art was a big part of everything we did. When I had my own kids, art was important from the beginning. Playdough, painting, coloring, and collage were a constant for my kids. They are both very good at art now, and though I don't think it is because of all the activities we had specifically, I do believe that their creativity was honored which has inspired them to go forward in life with that ability.
2. Each of your books makes a unique contribution. What about Scribble Art do you especially like?
 Scribble Art was the first book I wrote, and has sentimental connections back to my teaching years where all these ideas were tested with kindergarten through grade three children, children I knew and loved. I choose these projects because they were open-ended and I was so excited to write a book to encourage creativity for children where their own unique artwork rather than copying adult made cutesy projects. The book was published in 1985 and it is still my favorite and still selling well around the world (in 9 languages no less).
3. What tips would you give parents for doing art with very young children?
Start small! Rather than putting out jars of paint for a painting project, start with some shallow jar lids filled with about 1/8" of paint, perhaps three colors tops. Use small brushes or cotton buds for beginning. On the other hand, using big brushes and a bucket of water outdoors will paint thousands of rocks and squares in a sidewalk. Big or small, messy or tidy, start with fewer materials in the beginning, and add more in as the children become adept at using them and learn to handle the wonder of it all.
4. As a mother, I often feel my blood pressure rise when art starts to get messy because I envision myself spending the rest of the day cleaning it up. I would love to hear about how you dealt with the tension between creative art and cleaning up messes when you were a parent of young children.

5. Would you also give us some tips on doing open-ended art with young children in a group setting?
I like to place materials on the center of a table that everyone can gather 'round together (usually no more than 6 at the table at a time). Everyone can reach in and use what is available, and everyone cleans up their own mess. I rarely show them any finished product they should be trying to achieve; I would rather just see what they do with the materials. Most materials shout out how they should be used, so you don't have to say much. For example, if you have contact paper peeled away and sticky, and there are cotton balls and scraps of paper on the table, the kids will automatically stick the cotton balls and scraps to the sticky background. Let the materials you choose dictate how the activity will go. Sometimes you need to give a little demo or a brief explanation so they aren't left completely in the dark with new or unusual materials. But try not to make a sampale for them to copy, because they will copy it, and at that point, the whole purpose of creativity and unique thinking has gone out the window.
6. Which of your books / activities do you especially recommend for the youngest crowd? (2 to 5 year olds)
 Preschool Art is the best book for the 2-5 year old group, but it costs more than Scribble Art, and Scribble Art would do very well for that group too. My website also offers reduced price eBooks, which is another option.
7. Is there anything else you would like to add?
I would love for everyone who is interested to join my mailing list. I send out a very nice newsletter once a month called the ArtsyKidsNEWS, with four or five art projects that go well with that particular month. Halloween/Autumn/Harvest is coming up soon and will be sent by email, free of course, at the end of September. Each month one person wins a free art book! Sign up on my website, home page, lower right corner:
I'd love for your readers to visit my Facebook page too.
Go here:
or go here:
MaryAnn has such a gentle touch in her thinking about children and mothering. Wouldn't you loved to have had her for a teacher (or a mom-coach :)? To hear more of MaryAnn's kind voice take a look at the beautiful interview that Tinkerlab did recently.
 MaryAnn has graciously offered to give a copy of her book Mudworks (the bilingual edition) to one reader here at Having Fun at Home. To be entered in the giveaway, take a look at MaryAnn's website Brightring and leave a comment on this post about something you saw there. (make sure to leave an email address so I can contact you if you win)
For additional entries,
1) Like MaryAnn's Facebook page.
2) Like Having Fun at Home's Facebook page
Leave an extra comment for each of the above.
The giveaway will close at midnight on October 1st. At that time I will chose a winner using Random.org
Update: Giveaway closed. Winner is #21 Jennifer!
Sunday, September 9, 2012
Rainbow Fish Birthday Party
I'll grant that "Rainbow Fish" is a bit random for a party theme, but it was the best way I could see to combine the odd assortment of things we thought up for my daughters's joint birthday party.
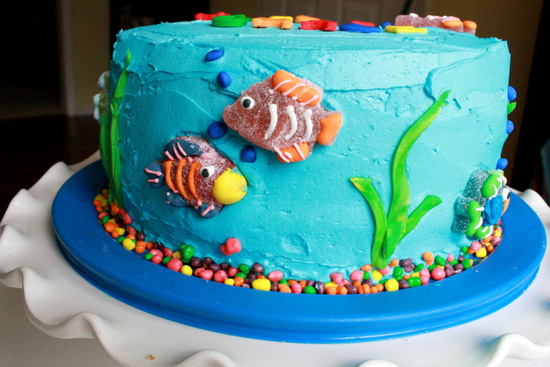 Things like this super easy but fun aquarium cake (inspired by Cakes and Cukes)
an Ocean Punchbowl (once upon the time there were fish in there, but they sank and were never seen again).
 Rainbow bell peppers and dip (and of course, Pepperidge Farms rainbow goldfish fit right in there; so we had to have those as well)
Fish Straws (these gummy fish worked great for the cake and straws)
 Rainbow doorways (If you've been following me for a while you'll remember our jumping through a rainbow day)
 A bubble pond

 Underwater artwork decorations. Each guest to the party drew a picture of fish or an underwater creature to give to my daughters in lieu of presents (no more toys!! :)
 Fishing game with waterbeads and marbles (more about this later)
 Fishing hats for coloring party favors. I traced the fish onto each hat using the easy method I wrote about this summer. The googly eyes were affixed with Jewel It glue. Each guest got to color their fish with regular markers. Every time they go through the wash, the hats can be colored all over again.
 I'm really a fan of using hats as party favors, by the way. It makes for such a cute group picture to commemorate the party.

 and my personal favorite, rainbow streamers on the ceiling fans. The picture doesn't do justice to how fun it is to stand in the middle of a rainbow swirling all around you. (Just be careful where and how you affix the streamers or it quickly becomes a tangled mess!)

 *Post contains affiliate links
an Ocean Punchbowl (once upon the time there were fish in there, but they sank and were never seen again).
Fish Straws (these gummy fish worked great for the cake and straws)
Tuesday, September 4, 2012
Musical Golf Clubs


(Pay no attention to the basket of laundry in the corner...you'd think with the kids entertaining themselves this well, I'd have time to put away a little laundry!)
Thursday, August 30, 2012
Invitation to Blow Bubbles
This set-up was part of the girls' joint birthday party that we had the other day . We filled the sandbox with homemade bubble solution (corn syrup helps the bubbles to not pop as easily).
 The bubbles kept some of the kids busy while others played the one and only party game (more about that later!)

Tuesday, August 14, 2012
Spray Away Chalk Letters

One problem though...spray bottles are just too fun. It's hard for little girls to resist spraying them all around the house.
The last time one of them gave the playroom floor a good soaking and caused the other one to slip and go flying I inwardly vowed that I was going to find some fun outlets for spray bottle spray that wouldn't make me grumpy.

So for a little review, I wrote out the letters of the alphabet in chalk on our back patio and gave the girls each a spray bottle. When it was their turn, I named a letter and their job was to find and spray it away. We went back and forth until all the letters were erased.
Simple, fun, and no grumpy mom at the end= what I was shooting for.
Do you have any more spray bottle ideas for us that fit this equation?
Wednesday, August 8, 2012
Travel Game: I Spy Treasure Bags

Well, we're back. We lived a crazy three weeks visiting lots of relatives and friends up North, and now we're settling back in to our daily routine. When I planned this trip I originally had all kinds of good intentions for making busy bags and learning activities to make the time pass like these magnetic puzzles or these fun marble maze bags.
But when it came right down to it, after all the packing and last minute errands I only ended up with about 15 minutes to spare for that kind of thing. I tried to make the most of it, and in the end, I think we got very good mileage (no pun intended) for the time and effort spent.
I Spy Treasure Bags
First, I brainstormed to come up with a list of things that we were likely to see on our trip but that weren't too common. Things like:
a moving train
a barn with a silo
horses
a suspension bridge
a car-carrying truck
45 speed limit sign
a school bus
something that said the word "Tennessee" on it
Then I did quick google image searches to find a picture for each item. I printed off a large size of each picture and pasted them onto lunch bags. I put treats inside of each bag.
I also cut and pasted all of the images in smaller version onto a single document. I gave one paper to each girl to refer to as she looked out the window. If she spotted one of the items she let us know and I found the bag with that picture on it. Inside of each bag was a set of surprise treats for everyone. Some of the bags had food treats (fruit leather, granola bars, etc). Other bags had little toys or books.
Since we were going to be on the road for almost three days straight, I waited until the second day to introduce the I Spy Bags. It took the girls longer to spot the items that I thought it might, which ended up being just fine. It spread the treats out over two days, and until the last item was spotted they always had something they could do.
I think they noticed a lot more scenery than they might have otherwise, and learned a few things along the way. (now they know what a suspension bridge is, for example!)

What other fun travel games or tips for road trips with kids have you tried or heard of lately? On our next road trip, little J will likely be old enough to get restless and we'll have THREE fidgety kids on our hands!
Friday, June 29, 2012
Watercolor Painting on Sand Dollars

Lately, I've tried to maximize our fun to clean-up ratio by saving messy art for times when we have two or three full hours to devote to the fun. So, the other day, I covered our kitchen table with a drop cloth and we spent the morning finding everything and anything our imaginations could think of to paint on and with.
That happened to include a couple of large sand dollars that I had saved in my craft cabinet, waiting for a good use. (Unfortunately, success stories in this department encourage me to keep my craft cabinet full to the BRIM)
The super absorbency of sand dollars means that they soak up the paint, and the color spreads across the shell like magic. (If you do this, make sure you use lots of water with your paint. A dry watercolor brush doesn't do much at all)
It's hard to improve upon God's creation. The sand dollar was probably actually prettier in it's original pure white form, but I think these are lovely in their own way as well.

I got my sand dollars at a garage sale, but I discovered recently that you can also buy sand dollars on Amazon.
(that's my affiliate link)
Subscribe to:
Posts (Atom)